Guide to Install WordPress on your Personal Computer using WAMP
Since WordPress is the most reliable content management system for creating fully-functional websites, every webmaster wants to use this platform to understand its diverse functions, features, and benefits. So, if you are planning to install WordPress on your local system (personal computer), then you must read this blog post. Here we discuss the entire process of installing WordPress on your local server environment or localhost using WAMP.
Most of the plugin developers and theme developers install WordPress on their local system to accelerate their development process. On the other site, a user installs it either to test plugins/times or to make changes to the site before transferring to live server.
Note: If you want to migrate your WordPress site to the live server, you need to buy a domain name and WordPress web hosting.
But if you want to install it on your local server environment, you only need a WAMP (WampServer). It is basically a compilation of Apache web server, PHP and MySQL compiled for Windows computer system. If you want to install WordPress on Windows, then you need WAMP. Well, there are various other clients for Windows such as XAMPP, but WAMP is more reliable, user-friendly and free solution.
The Entire Process of Installing WordPress on Windows System:
- Install WampServer on your PC
- Set up a database for WordPress
- Install WordPress On PC using WAMP
Let’s get started!
1. Installing WampServer on Local Server Environment (PC)
- First, you need to visit the WampServer website to download its latest version.
- Here you will see multiple options their download page. You just need to select the most suitable one that applies to your windows (64-bit or 32-bit).
- You can also choose the 32-bit version in case of any doubt. It will work on 64-bit versions of Windows with ease.
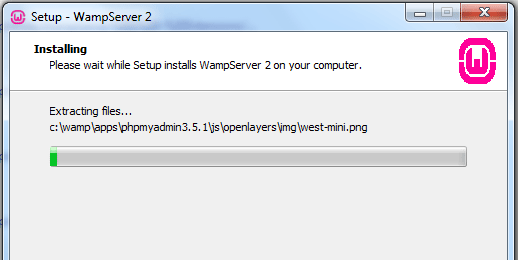
- After downloading the WAMP, you need to run the installation program by trailing the on-screen instructions.
- Now the WampServer will ask for the location of the default web browser. By default, it will use IE, but you can tweak it with Firefox or Google Chrome by locating the browser in Program Files.
- After completing the installation process, you can launch WampServer on your PC.
2. Setting up a Database For WordPress
WampServer offers phpMyAdmin application to let you manage all the MySQL databases with ease. For that you need to trail the following procedure:
- Click on the WAMP icon right in your Windows taskbar > click on phpmyadmin.
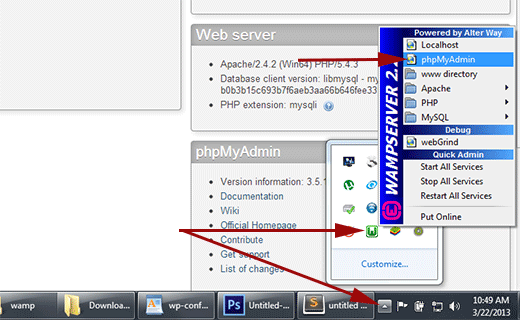
- Now you will be redirected to a new browser window with an opened phpMyAdmin.
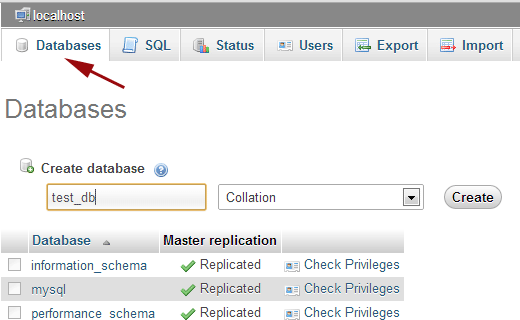
- Create the new database for WordPress by click on phpMyAdmin.
- Pick a name for your database and hit on “Create” button.
3. Installing WordPress on PC Using WAMP
- Visit WordPress.org to download a copy of WordPress.
- Extract the zip file and copy the WP folder.
- Visit C://wamp/www and paste WP folder there.
- Rename the WP folder to anything relevant to your business or website, such as mywebsite.
- Now open a new browser and go to http://localhost/mysite/
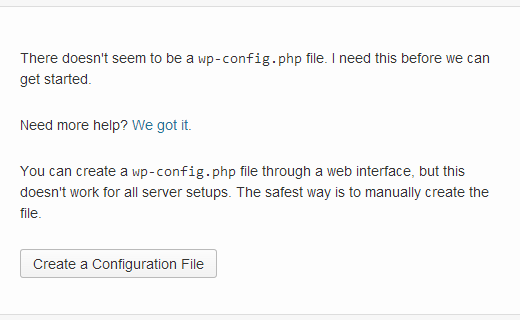
- Here WordPress will tell you that it can not find a wp-config.php file. So you need to click on the Create a Configuration File button to develop it.
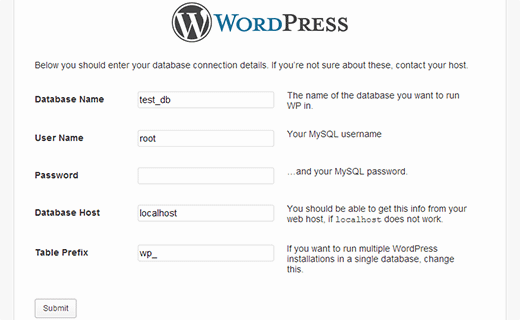
- You will be redirected to the next screen where you need to provide your database information. (Note: here you need to mention the selected database name).
- Remember that your default database username will remain the same. You can click on the submit button and WordPress will automatically create a configuration file for you.
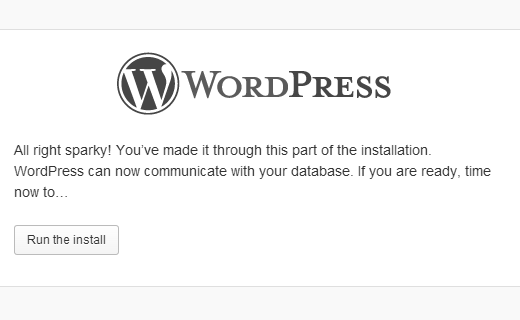
- Now you sill see a screen indicating that WordPress has successfully created the configuration file, and you can go through it with the installation.
- Click on Run Install icon to install WordPress on your PC.
- You will be taken to next screen where you need to fill out the installation form. Make sure that you provide a title for your site, select unique admin username and password, and enter admin email address.
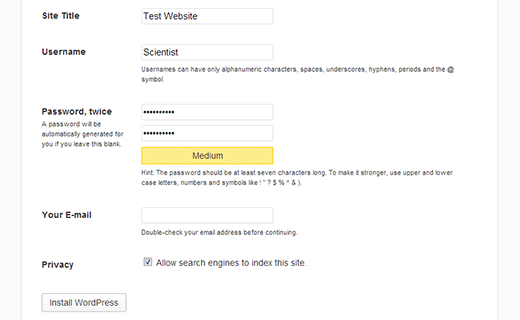
- At last, you can click the Install WordPress button.
- WordPress will run the installation and create database tables for you. Then, you can proceed to your WordPress just by clicking on the Log in button.
Conclusion
Follow these steps to install WordPress on your local server environment/Windows PC for testing purposes. These are easy-to-follow steps that will make your job easier. All you need to do is to understand and follow these steps carefully.

About Author
Matt
Matt Mullens is a founder of bestdesign2themes as well as a web developer. He loves writing about best web design and also sharing knowledge about latest advancements in the world of Web design and development. He also likes to share ideas about cms, various software, Programming languages and technology.