Simple Steps to Install Google Analytics to a WordPress Site
The real hard work begins after the launch of a WordPress site. No doubt, the features and functions offered by the WordPress makes it easy for people to build full-fledged websites in a matter of few minutes. But to generate quality needs, you have to know where your web traffic is coming from and how much organic traffic getting for your site. This information will help you boost the performance of your site and enable you to see what sort of response you are getting from your potential web visitors.
In order to gather such information, you need to install Google Analytics tool to your WordPress site. It is a popular and free solution that can help you track your site performance for the better outcome. In this blog post, we will share you the simple steps to add Google Analytics to your WP site.
Google Analytics
Google Analytics is an incredible website tracking software that helps you get deep insight about your site traffic, user engagement, conversions, user behavior, and a lot more. The tool can lead you towards the success of your business in a very genuine way.
With the help of Google Analytics, you can see a list of multiple things such as how much traffic your site is receiving, different sources of your web traffic, the number of sessions, bounce rate and conversion rates and a lot more in seconds.
You can even export your Google Analytics data in different formats or create your own customized dashboard as per your convenience. In simple terms we can say, Google Analytics has now become the most sought-after web analytics service on the Internet.
The Working Procedure of Google Analytics
You can integrate Google Analytics to your site by adding a line of coding (known as JavaScript) that will let you collect data regarding the performance of your site. Whenever visitor lands on your site in real time, they are tagged with the tracking code and their “Session on your site will get started.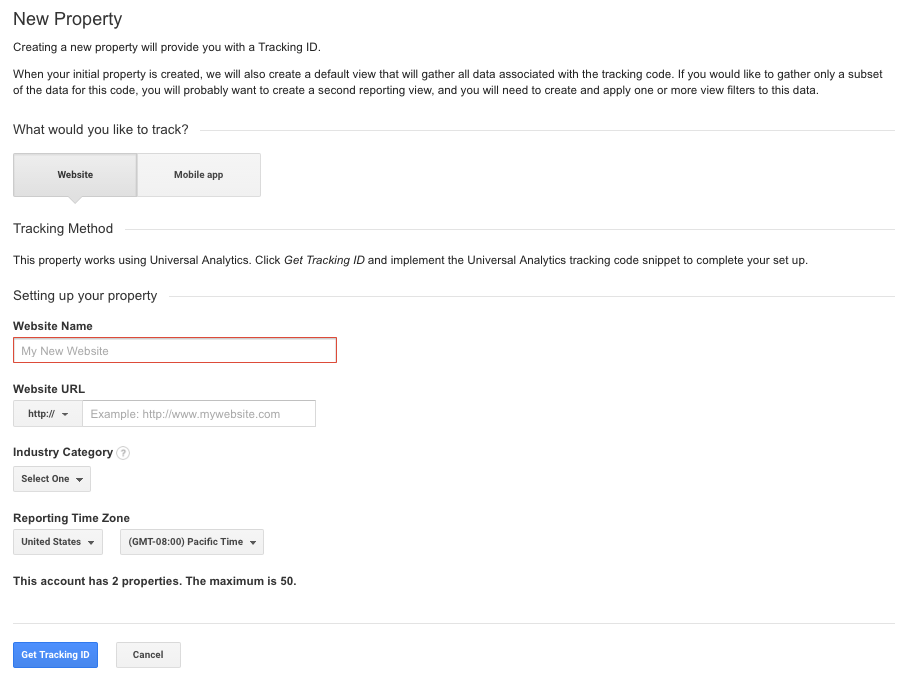 Make sure that your tracking code is placed on every web page of your site so that you can gather all the traffic data and performance reports with ease. The code also ensures that the tracking can follow every site visitor as they navigate your site.
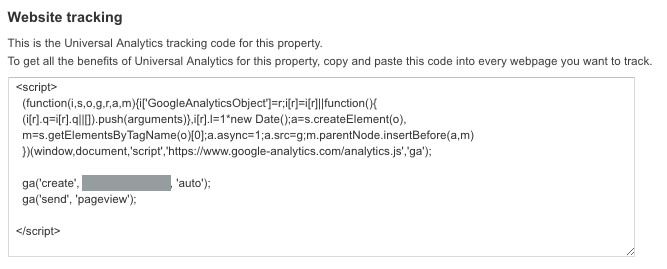 Follow the steps for installing Google Analytics to your fully-fledged WordPress site:
1. Create an Account
- Creating a Google account is a must if you want to add Google Analytics to your site.
- Once have created your account, visit http://analytics.goolge.com and login.
- Now you will be redirected to a page where you need to sign up for Google Analytics. Follow the steps to set your analytics account.
- After filling out all the information, click on the “Get Tracking ID” button. You will be redirected to a screen displaying you a code snippet that you’ll need to copy.
Note: Don’t forget to highlight the entire code snippet before copying it.
2. Install the Google Analytics code
There are multiple ways of adding Google Analytics code to your WordPress site. Pick the method below that can match your needs and expectations.
Method #1: Manually adding Analytics to your WP site
This is one of the easiest ways of adding Google Analytics to a site. All you need to do is to insert the code into the header or footer of your site.
For that, you need to navigate to your WordPress dashboard and visit to Appearance>Editor>header.php. Thereafter, you need to paste the code in the step above right after
tag.Method #2: Insert Analytics code into your installed theme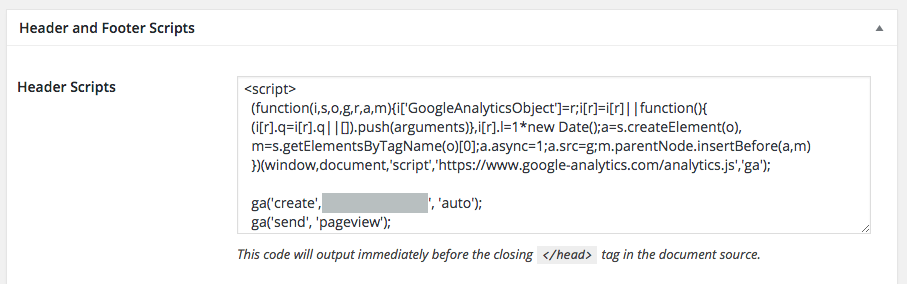 You can also integrate Google Analytics by pasting code directly into your theme settings page. For this, you need to navigate to your theme’s options page. You can easily find it by navigating to your “Theme Name”> Theme Settings.
Method #3: Use Google Analytics by MonsterInsights Plugin
WordPress offers a ton of Google Analytics plugins to let you track more elements of your site in a simple and quick way. While some are quick to set up and others render analytics data within your WordPress dashboard.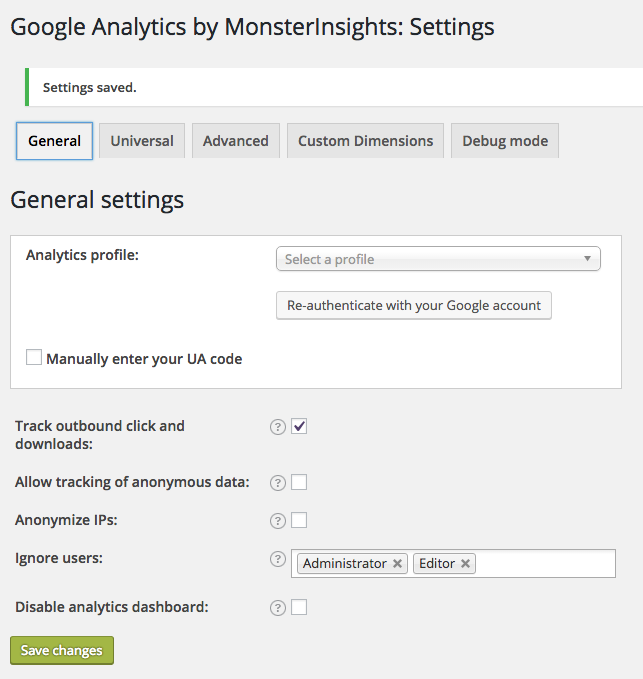 To make your work easier, we bring you the process of setting up Google Analytics by MonsterInsights plugin:
- First, upload the Google Analytics by MonsterInsights plugin and activate it.
- Navigate to the “Settings” section right under the new “Analytics” menu.
- Now connect your Google Analytics account to the plugin. You can do this either by authenticating with your Google account or manually submitting your User Account code.
- Authenticate with your Google Account: After signing in to your Google Analytics account, you will need to click on the “Authenticate with your Google account” option. This will automatically connect you with your Google Account.
- Manually submit your UA (User Account) code: Click on the “ Manually enter your UA code” checkbox > return to your Google Analytics account and click on the “Admin” link in the main menu > click on “Property Settings” right under the center “Property column”. Now, copy the code under “Tracking ID” and paste in into the plugin field.
- Click the “Save Changes” icon and your site is ready to track your visitor data.
Conclusion
These are the simple steps that will help you install Google Analytics to your site and let you know about your performance of your site, flow of web traffic, visitor’s behavior while accessing your site in real time, conversion rate and bounce rate for better visibility.


About Author
Matt
Matt Mullens is a founder of bestdesign2themes as well as a web developer. He loves writing about best web design and also sharing knowledge about latest advancements in the world of Web design and development. He also likes to share ideas about cms, various software, Programming languages and technology.